Trying to work out how to activate eSIM on Google Pixel? You may have a carrier download waiting, a QR code in your email, an app-based installation or a number that needs to move from another phone. Google Pixel supports all of these setup routes, but they are not interchangeable.
Most activations begin under Settings → Network & internet → SIMs → Add SIM → Set up an eSIM. I’ll show you which option matches your plan, how to protect a working line during a transfer and how to confirm that the eSIM is actually providing service, not just sitting in the SIMs list.
Which eSIM Setup Route Does Your Google Pixel Need?
| What you have | Where to start | What happens to an existing line? |
|---|---|---|
| A new Pixel with an eSIM assigned by your carrier | Follow the Download SIM prompt during phone setup, or the carrier’s ready-to-install prompt later | Your carrier controls whether it is a new line or a move of your current number |
| A QR code for a new carrier or travel plan | Open SIMs → Add SIM → Set up an eSIM and follow the QR setup prompt | Usually adds the plan identified by that code; it does not automatically move another line |
| Manual installation details | Open Pixel eSIM setup, then use the manual-entry option if it appears and your issuer supplied the required details | Depends on the plan those details belong to |
| Instructions to install through an app | Begin in the carrier’s or travel provider’s app | Follow the app’s account and line-selection prompts |
| Your current number on another phone | Choose Transfer SIM from another device when your carrier supports that route | Moves the existing service when the carrier completes activation |
| A physical SIM already in this Pixel | Check whether Convert to eSIM appears for that line | Replaces the physical SIM on the same phone after successful conversion |
Choose the row that matches the plan you were given. Scanning a travel-plan QR code will not convert your regular carrier number, and transferring your regular number is different from adding a second data plan.
Check Your Pixel Model, Carrier Eligibility and Setup Details
Google’s Pixel SIM guidance says Pixel 4 and later phones support eSIM. Earlier models need a closer check:
| Pixel model | Google’s eSIM qualification |
|---|---|
| Original Pixel and Pixel XL from 2016 | No eSIM support |
| Pixel 2 | eSIM works only on phones bought with Google Fi service |
| Pixel 3 | Restrictions apply to phones bought with certain U.S. or Canadian carrier service and to phones bought in Australia, Taiwan, or Japan |
| Pixel 3a | Phones bought with Verizon service or in Japan do not work with eSIM |
| Pixel 4 and later | eSIM support is built in; your carrier, account, phone lock, and regional variant can still affect activation |
In the United States, the Pixel 10, Pixel 10 Pro and Pixel 10 Pro XL are eSIM-only. The Pixel 10a, Pixel 10 Pro Fold and Pixel 11 Pro Fold support a physical nano-SIM and eSIM. Outside the United States, SIM arrangements can differ by market. These distinctions matter if you planned to move a plastic SIM into a new phone.
Before you begin, use the eSIM Compatibility Checker if you need to confirm your exact Pixel model or market variant. Then establish that your carrier accepts the device and account. A phone with eSIM hardware can still be locked to another carrier or ineligible for a particular plan.
Find Set up an eSIM Under Network & internet → SIMs
Google’s current instructions for setting up a new Pixel eSIM cover both first-time phone setup and a phone that is already configured. If your Pixel is already configured:
- Open Settings.
- Tap Network & internet.
- Tap SIMs.
- Tap Add SIM, then Set up an eSIM.
- Follow the on-screen option that matches your carrier or provider instructions.
Google uses those menu names in its current Pixel instructions. Older Pixel software, carrier screens, and provider tutorials may display a + icon or wording such as Download a SIM instead? If your screen differs, follow the available eSIM setup choice and the instructions for your particular plan; do not assume an older tutorial’s buttons must appear exactly.
Add an eSIM during your Pixel’s first setup
A carrier may have assigned the eSIM to a new phone before you turn it on. As you set up the Pixel, follow the mobile-network prompt and select Download SIM, then Set up when offered. Complete the carrier prompts and let the profile download.
If the assigned plan does not appear, the carrier may first need to activate or associate it with your device and account. Do not scan an unrelated QR code or start a new line to compensate for a missing assignment.
Open Add SIM after the Pixel is already set up
You can return to Settings → Network & internet → SIMs → Add SIM later. This is also the starting point for adding a second travel plan while keeping a home line installed. If the line you want is already listed under SIMs, inspect its status before trying to install it again.
Download a Carrier-Assigned eSIM on Your Pixel
With carrier-assigned activation, the carrier provisions the plan for your account and device. The Pixel then downloads that assigned profile over an internet connection. Depending on the carrier, you may see the offer during initial phone setup, receive a ready-to-install notification, or need to start in your account or carrier app.
U.S. carriers illustrate why there is no single carrier procedure:
- AT&T documents a pending eSIM notification on supported Pixel setups and a separate QR-code or activation-code route. Use the method AT&T issued for your device and line.
- Verizon provides account-led eSIM activation options through My Verizon or its website for eligible lines and bring-your-own-device activation. Complete the Verizon account step that applies to your line, then follow the download prompt the Pixel presents.
- T-Mobile describes an eSIM prompt during Pixel setup or, when a plan is ready after setup, a prompt while connected to Wi-Fi. Its SIM and eSIM instructions also direct Pixel users to SIMs → Add SIM when they chose to activate later.
- Google Fi uses the Google Fi app for account sign-in and service setup on a compatible, unlocked phone.
These are examples of carrier-controlled provisioning, not interchangeable instructions. If your carrier has assigned an existing number to the new Pixel, follow its device-change process. Keep the previous phone and its working line available until the new service is confirmed.
Add a Pixel eSIM With a QR Code or Manual Details
A QR code contains installation credentials for the plan its issuer prepared. Use the code supplied for this carrier or travel eSIM, and make sure the Pixel has internet access while the profile downloads.
- Open Settings → Network & internet → SIMs → Add SIM → Set up an eSIM.
- Follow the option to scan the QR code when it appears.
- Display the code clearly on another screen or a printed page and scan it with the Pixel.
- Review the plan shown on screen, then allow the download and finish the prompts.
- Return to SIMs to check whether the new profile appears.
If the QR code is only on the Pixel you are setting up, the dependable route is to open it on another device. If the issuer also supplies manual details, those may provide another installation route. Google’s general Pixel eSIM instructions do not establish that every current Pixel eSIM setup screen can import a saved QR image, so do not rely on a photo-selection control being present.
Enter details manually when your issuer provides them
Some providers supply an SM-DP+ address, an activation code, and sometimes a confirmation code. If your Pixel’s eSIM scanner offers Need help? and Enter it manually, enter the details exactly as that issuer provided them, then follow the download prompts. Airalo, for example, documents this route for its own Pixel eSIMs.
A manual code is not something to generate from an IMEI or guess from another plan. If your carrier or provider supplied only a QR code and no manual credentials, ask that issuer for its supported alternative when scanning is unavailable.
Install Through Your Carrier or Travel eSIM App
An app can handle account authentication and initiate the eSIM download without requiring you to type an activation code. Open the app associated with the plan, sign in to the correct account, select the correct line or purchased eSIM, and follow its installation instructions. Approve the Pixel system prompt when the app hands installation to the phone.
For a carrier eSIM, the account step can determine which phone number moves or activates. For a travel eSIM, the app generally adds a separate plan, often for data. Installing that travel profile does not transfer your home number or prove that the plan has reached its destination network.
The eSIM Setup & Compatibility hub is useful if you are setting up another device as well, or need broader guidance on eSIM eligibility and line management.
Move Your Existing Line to a New Pixel
A supported transfer moves service associated with your existing SIM or eSIM to the new phone. During Pixel onboarding, keep the old phone nearby, choose the line offered for transfer, and follow the prompts to transfer and activate it. If you skipped that stage, Google also documents Settings → Network & internet → SIMs → Add SIM → Transfer SIM from another device.
For Google’s automatic Android-to-Pixel transfer, both devices need Android 12 or later, current Google Play Services, and screen locks. The carrier must support the transfer path. If no transfer offer appears, or the carrier asks you to use an app, account portal, fresh QR code, or support-assisted move, use that carrier’s route.
Leave the old device intact while you check the result. A failed transfer does not necessarily cancel the working service on the previous phone. Confirm that the number works on the new Pixel before treating the move as complete.
Convert a Physical SIM on an Eligible Pixel
If you want to replace the physical SIM already in your Pixel with an eSIM for the same line, Google documents an on-device conversion for Pixel 7 and later, including Fold, when the carrier supports it. Connect to Wi-Fi, then:
- Open Settings → Network & internet → SIMs.
- Select the physical-SIM line you want to convert.
- Scroll through that line’s settings and tap Convert to eSIM, if offered.
- Follow the on-screen instructions and confirm the eSIM provides service.
After a successful conversion, the physical SIM no longer works. Wait until the eSIM is working before discarding the card. If Convert to eSIM does not appear, do not assume the Pixel is incompatible: the carrier or account may require another conversion route. A U.S. Pixel 10 or later model without a physical-SIM slot cannot perform a same-phone conversion from an inserted card. The Pixel 10a, Pixel 10 Pro Fold and Pixel 11 Pro Fold have nano-SIM slots, so that particular limitation does not apply to them.
Choose the Pixel SIM for Mobile Data, Calls and Texts
Downloading a travel eSIM adds a profile; it does not necessarily make it your data line. Open Settings → Network & internet → SIMs, turn on the new line as instructed, and select the intended defaults for Mobile data, Calls, and Texts. Google’s Pixel Dual SIM instructions say only one SIM can be the default for mobile data at a time.
For a typical trip, you may keep your home number available for calls and texts while choosing the travel eSIM for data. That arrangement depends on your Pixel’s active-SIM capability, the carriers involved, and the travel plan. Pixel 7/7 Pro and later phones can use two active eSIM profiles when the carrier allows it; other supported configurations may use one physical SIM and one eSIM.
Do not assume a data-only travel eSIM gives you a new phone number. Also consider your home carrier’s roaming charges before leaving the home line enabled abroad. Turn on data roaming for the travel line only when its provider requires it for destination service, and check that any automatic data-switching setting will not send usage through an expensive home line.
Check That Your Pixel eSIM Is Installed and Providing Service
Check these stages in order. Each answers a different question:
- Installed: The new plan appears under Settings → Network & internet → SIMs. This confirms that a profile is on the phone.
- Enabled: The Pixel shows the line turned on for use. If you have multiple SIMs, confirm you are inspecting the new one.
- Activated and registered: Where the plan should have coverage and has begun service, the line connects to an available mobile network. A travel plan may not register on its destination network while you are still at home.
- Selected for the intended task: Set the correct line for mobile data, and the appropriate lines for calls and texts.
- Working data: In a covered location after the plan starts, temporarily turn off Wi-Fi and load a webpage using mobile data. Turn Wi-Fi back on afterward.
An installed profile alone is not proof of working service. If the eSIM appears but a destination plan has not started yet, follow its start conditions before judging it as failed. If the plan should be active but cannot register or provide data, identify the failing stage instead of repeatedly adding the profile.
Where to Go When Pixel eSIM Setup Stops
Use the symptom to decide the next action:
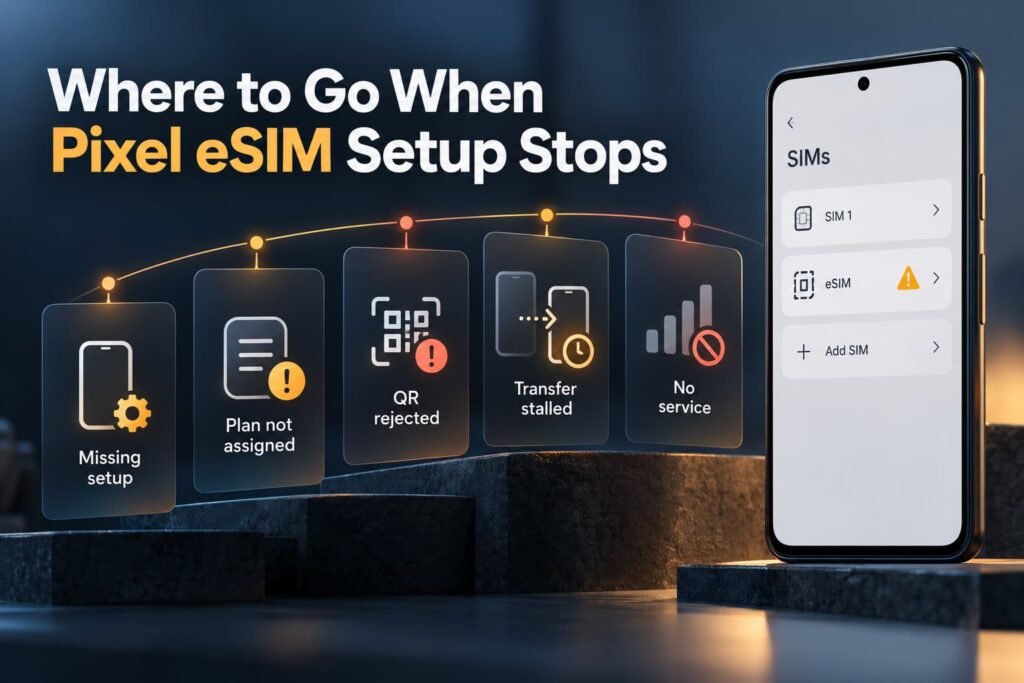
- Set up an eSIM is absent: Recheck the exact Pixel model and regional variant, current software, and carrier eligibility.
- An assigned plan does not appear: Ask the carrier whether the correct device and account have been provisioned.
- A QR code or manual details are rejected: Ask the issuer whether the credentials are valid for this plan and whether replacement details are needed.
- A transfer cannot finish: Keep the previous line available and use the carrier’s supported device-change route.
- The profile is present but has no service or data: Check that the line is enabled, selected for data, within coverage, and past the provider’s plan-start condition.
For a persistent failure, use the eSIM Troubleshooting guide and the carrier’s or provider’s support route. Do not delete an installed eSIM as a routine reset. First establish how that exact plan can be downloaded again.
Frequently Asked Questions About Google Pixel eSIM Activation
Why is Set up an eSIM missing on my Google Pixel?
Start with the exact phone, not just the Pixel name. The original Pixel has no eSIM support, while Pixel 2, Pixel 3, and Pixel 3a have specific purchase or carrier restrictions. A carrier may also decline a supported Pixel variant or require a different activation route. Check whether the plan is already present under SIMs before assuming you need to add it again.
If the phone should be eligible, compare your Settings screen with Google’s current Network & internet → SIMs → Add SIM path and follow the eSIM option actually displayed. Your carrier can determine whether it has enabled eSIM for the particular device and line. A missing option and a rejected activation code are different problems, so describe the exact screen when seeking support.
Which Pixel 2, Pixel 3 and Pixel 3a Models Support eSIM?
According to Google, Pixel 2 eSIM works only on phones bought with Google Fi service. For Pixel 3, phones bought with service from U.S. or Canadian carriers other than Sprint and Google Fi do not work with eSIM; Pixel 3 phones bought in Australia, Taiwan, or Japan also do not work with it. For Pixel 3a, phones bought with Verizon service or in Japan do not work with eSIM.
Those restrictions make the model name alone an incomplete compatibility check. Identify where the phone was bought and, where relevant, the service it was bought with. Then confirm that the carrier or travel provider accepts that specific device. An EID or an eSIM-related menu is useful device information, but it does not override Google’s stated purchase restrictions or a carrier’s eligibility decision.
Do I need Wi-Fi to activate an eSIM on a Pixel?
Use a dependable internet connection to download the profile. Wi-Fi is the clearest starting point when the new Pixel has no working mobile line, and carriers such as T-Mobile describe downloading the eSIM over Wi-Fi. Google specifically requires Wi-Fi for its supported on-device physical-SIM-to-eSIM conversion.
Downloading the profile and connecting to mobile service happen at different stages. A travel eSIM may install over Wi-Fi before departure but not provide mobile data until its plan starts and the Pixel reaches a supported destination network. Check the issuer’s activation conditions as well as the Pixel’s line settings.
Which Pixel IMEI or EID should I give my carrier?
Give the identifier your carrier requests for this activation or transfer. On the Pixel, Google points to Settings → About phone for IMEI and About phone → SIM status for EID. A carrier may request IMEI 2 when setting up eSIM or Dual SIM, so do not substitute the first IMEI merely because it is easier to find.
Use the carrier’s secure app, account flow, or support channel to submit device identifiers. A travel eSIM’s QR code or manual activation details serve a different purpose; they are not interchangeable with IMEI or EID.
Will transferring my number to a new Pixel turn off my old phone?
Your existing service moves when the carrier completes activation on the new device. The transfer choice on the Pixel starts that process, but a screen appearing or a profile downloading does not by itself prove that calls, texts, and data have moved successfully.
Keep the old phone and its line available until you verify the new Pixel. Google notes that the existing device or eSIM can still work if a transfer is unsuccessful. If the direct transfer fails, follow your carrier’s device-change procedure instead of deleting the old profile.
Can I reuse a QR code after deleting the eSIM from my Pixel?
That depends on the issuer and the activation credentials. Do not assume the code can install the same plan again simply because you still have the image or email. A carrier or travel provider may need to reset the assignment, reissue credentials, or provide a different restoration method.
Before removing a profile, check the issuer’s reinstallation instructions for your plan and account. If the profile is already present but lacks data, first examine the enabled line, default data SIM, coverage, and plan-start conditions. Repeated scans cannot fix a connection problem that occurs after installation.
When should I install a travel eSIM on my Google Pixel before departure?
Install it while you have dependable internet access if your provider permits installation before the trip. That gives you time to confirm the profile appears under SIMs and to save the provider’s connection instructions. Do not assume that installing it starts the data allowance: plans differ on whether validity begins at installation, first network connection, or another stated event.
Set the travel line as the data SIM at the appropriate point in your journey and enable data roaming for that line only when its provider instructs you to. Keep your home line’s calls, texts, and roaming settings aligned with how you intend to use your regular number abroad.
Related Guides
- How to Activate an eSIM on iPhone for Apple’s activation and transfer choices.
- How to Activate an eSIM on Samsung Galaxy for Samsung’s SIM Manager and carrier setup routes.
Final Thoughts
The useful first question is who controls the plan you are adding. A carrier-assigned download, a travel-provider QR code, and a transfer of your existing number may all begin near Add SIM, but they do different jobs. My advice is to start with the activation route supplied by the carrier or provider rather than choosing a different method because it looks faster. Follow the path tied to your actual account or purchased plan.
Once the profile appears, take one more minute to check the enabled line and data selection. When the plan should have coverage, test it with Wi-Fi off. That final check tells you far more than a successful download screen, and it shows whether you are finished or need help with activation or connectivity.