The best way to activate an eSIM on iPhone depends on what you are trying to do. Moving an existing phone number to a new iPhone is different from activating a new carrier line, converting a physical SIM or installing a temporary travel eSIM.
Apple provides several activation methods, but your carrier decides which ones are available for your device, account, plan and country. You may receive an automatic activation prompt, use Quick Transfer, scan a QR code, open an activation link, install through an app or enter the eSIM details manually.
At a Glance: How to Activate an eSIM on iPhone
Open Settings > Cellular > Add eSIM. Depending on what your carrier or travel eSIM provider supplied, you can use Carrier Activation, transfer a line from a nearby iPhone, scan a QR code, open an activation link, install through an app or enter the activation details manually.
After the eSIM is installed, turn on the line, give it a clear label and choose which line should handle cellular data, calls and messages. For a travel eSIM, also check whether the provider requires Data Roaming on.
Before You Activate an eSIM on iPhone
Check the following before beginning:
- Your exact iPhone model and regional variant support eSIM.
- The carrier or travel eSIM provider supports the device, account and plan.
- Your iPhone has the latest version of iOS available for that model.
- A reliable Wi-Fi or hotspot connection is available unless your carrier and regional iPhone support activation without one.
- Your phone is unlocked if the new eSIM comes from a different carrier.
- You have the QR code, app, activation link, carrier notification or manual details assigned to the plan.
- Both iPhones are nearby, unlocked and available if you are transferring an existing line.
If you are unsure about the exact model or regional version, check it with the eSIM Compatibility Checker before starting.
To check the phone’s lock status, open Settings > General > About and find Carrier Lock. An unlocked iPhone should show No SIM restrictions. Only the carrier that locked the device can unlock it, as Apple explains in its iPhone carrier-unlock guidance.
The About screen also displays the IMEI, IMEI2 and EID. The IMEI identifies cellular hardware, while the EID identifies the iPhone’s embedded SIM hardware. A carrier may request the IMEI, IMEI2, EID or a combination of these identifiers when checking BYOD eligibility, assigning an eSIM or moving service to another phone.
Which iPhone Models Support eSIM?
Apple introduced eSIM support with the iPhone XS, iPhone XS Max and iPhone XR. An iPhone 8, iPhone 8 Plus or iPhone X cannot install an eSIM, regardless of which carrier, app or QR code you try to use.
Apple never released a model officially named “iPhone 10.” People searching for an iPhone 10 usually mean the iPhone X, which does not support eSIM.
The table below shows the general support baseline. Regional hardware and carrier availability can still change whether eSIM works on a particular iPhone variant.
| iPhone model | General eSIM support | What it means |
|---|---|---|
| iPhone 8 and iPhone 8 Plus | Not supported | These models cannot install or activate an eSIM. |
| iPhone X, sometimes called “iPhone 10” | Not supported | The iPhone X does not include eSIM support. |
| iPhone XS, iPhone XS Max and iPhone XR | Supported, with regional exceptions | These were the first eSIM-compatible iPhones. |
| iPhone 11 series | Supported, with regional exceptions | Use the activation method supplied by the carrier or provider. |
| iPhone SE, 1st generation | Not supported | This version of the iPhone SE does not support eSIM. |
| iPhone SE, 2nd generation | Supported, with regional exceptions | Supports eSIM alongside a physical SIM on compatible regional variants. |
| iPhone 12 series | Supported, with regional exceptions | Carrier Activation, QR codes, apps and other supported methods can be used. |
| iPhone 13 series | Supported, with regional exceptions | Supports two active eSIMs, subject to carrier and regional availability. |
| iPhone SE, 3rd generation | Supported, with regional exceptions | Supports two active eSIMs when the carrier and plan allow it. |
| iPhone 14 series | Supported, with regional exceptions | SIM-tray configuration varies by country and regional model. |
| iPhone 15 series | Supported, with regional exceptions | Physical-SIM availability depends on the regional variant. |
| iPhone 16 series and iPhone 16e | Supported, with regional exceptions | Carrier support and the regional hardware configuration still apply. |
| iPhone 17 series, iPhone 17e and iPhone Air | Supported, with regional exceptions | Physical-SIM and eSIM availability can differ by model and market. |
| iPhone 18 Pro and iPhone 18 Pro Max | Supported, with regional exceptions | Confirm the exact regional model and carrier activation requirements. |
| iPhone Duo | Supported | Uses dual eSIM, supports two active eSIMs and does not support a physical SIM. |
Regional hardware matters. In mainland China, Hong Kong and Macao, eSIM and physical-SIM configurations can differ substantially from models sold elsewhere. Check the exact model number rather than relying only on the marketing name.
How to Activate an eSIM on iPhone 13 Pro Max, 14, 15, 16 and 17
The activation process is broadly the same on the iPhone 13 Pro Max, iPhone 14, iPhone 15, iPhone 16 and iPhone 17. Start at Settings > Cellular > Add eSIM, then select the method supplied by your carrier or travel eSIM provider. Available transfer options, menu labels and carrier-verification steps can vary by iOS version, provider and country.
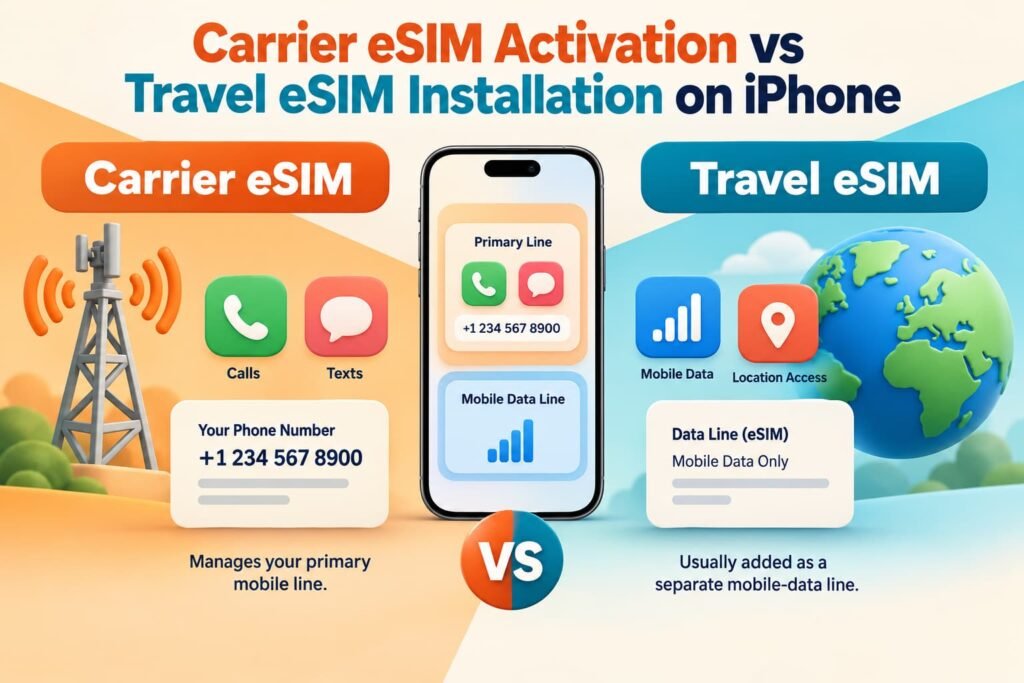
Carrier eSIM Activation vs Travel eSIM Installation on iPhone
A normal carrier eSIM usually represents your primary cellular service. It may include your regular phone number, calls, SMS and mobile data. Activating it can require account authentication, number-transfer approval, a carrier-issued activation push or validation of the new iPhone’s IMEI and EID.
A travel eSIM is normally added as a second line for temporary data service. Most travel eSIM companies deliver it through a QR code, provider app, activation link or manual installation details. Installing one usually does not transfer or replace the phone number on your home line.
| Normal carrier eSIM | Travel eSIM |
|---|---|
| Often carries your primary phone number | Usually provides temporary travel data |
| May replace an existing physical SIM or eSIM | Normally remains alongside the primary line |
| May require carrier-account authentication | Usually requires a purchase account, QR code, app or link |
| Can deactivate the previous SIM after a transfer | Should not deactivate the primary line simply because it is installed |
| May use Carrier Activation or Quick Transfer | Commonly uses a QR code, app, link or manual details |
| Usually becomes active on the carrier’s home network | May not connect until you reach a supported destination |
An unlocked iPhone can keep the home line available for calls and messages while using the travel eSIM for cellular data. However, leaving the home line active can still create roaming charges for calls, texts, voicemail or unintended data use. The correct settings depend on your carrier and how you want to use the two lines.
Choose the Correct iPhone eSIM Activation Method
| Your situation | Method to use |
|---|---|
| The carrier assigned a new plan digitally | eSIM Carrier Activation |
| You are moving an eligible number from another iPhone | eSIM Quick Transfer |
| You received a printed or onscreen code | QR-code activation |
| The carrier or provider sent a setup link | Activation link |
| The provider directs you to its app | Carrier or travel eSIM app |
| You received an SM-DP+ address and activation code | Manual entry |
| You are replacing a physical SIM on the same iPhone | Convert to eSIM |
| You are moving service from Android | Supported device transfer or carrier-assisted reissue |
Do not choose a method because it appears easiest. Start with the method assigned by the carrier or provider. A QR code cannot replace a carrier-pushed activation unless the carrier issued that code for the same line.
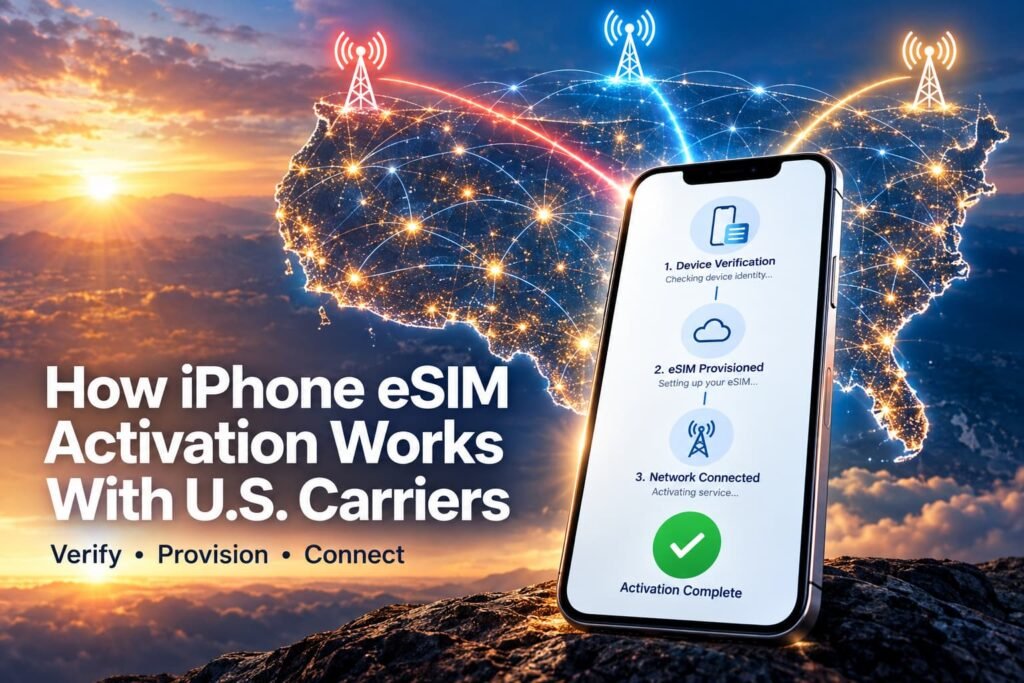
How iPhone eSIM Activation Works With U.S. Carriers
AT&T, Verizon and T-Mobile all support eSIM on eligible iPhones, but that does not mean every customer follows the same steps. The activation path can change based on whether you are opening a new line, upgrading a phone, moving an existing number, bringing an unlocked device, converting a physical SIM or activating prepaid service.
Apple’s current U.S. carrier support list shows AT&T, T-Mobile and Verizon under eSIM Carrier Activation and eSIM Quick Transfer. Apple also lists them among carriers offering other activation methods. Availability for an individual customer can still depend on the account, plan and device.
AT&T
An AT&T iPhone may receive an automatically assigned plan or a Cellular Plan Ready to Be Installed notification. AT&T also supports QR-code installation in some situations, including certain prepaid activation kits.
For a new line, upgrade or replacement phone, begin with the process supplied through the order or the official AT&T activation page. When switching an existing line to a replacement device, AT&T may use the iPhone’s IMEI and EID to determine compatibility and the appropriate activation path.
AT&T Prepaid can differ from postpaid service. Its current prepaid instructions describe automatic downloads, activation notifications and QR-code kits, depending on how the eSIM was purchased.
Verizon
Verizon’s process changes between a standard monthly account, prepaid service, a newly purchased phone and a BYOD activation. An eligible iPhone may receive a carrier-assigned eSIM during setup or use Quick Transfer when the account and devices qualify.
Verizon provides a separate monthly-plan eSIM activation guide. Verizon Prepaid directs customers through the My Verizon app, which checks device compatibility and guides the activation.
If you are bringing an iPhone from another carrier, verify that it is unlocked and accepted by Verizon before removing the previous SIM or deleting its eSIM profile.
T-Mobile
T-Mobile supports Carrier Activation, Quick Transfer and other eSIM activation paths on eligible iPhones. A new phone may activate during setup, while a BYOD or prepaid customer may begin through a compatibility check, online activation flow or account process.
T-Mobile’s BYOD checker may request the EID when it cannot confirm eSIM compatibility from the initial device information. Its SIM and eSIM support page also covers supported transfer and device-specific paths.
The important distinction is not simply which carrier you use. It is whether you are activating a new line, moving an existing line, replacing a device or adding prepaid service. Those situations can produce different instructions even for two customers using the same iPhone model.
Carrier-Assigned eSIM Activation on iPhone
eSIM Carrier Activation means the carrier digitally assigns the plan to the iPhone. You may see the option while setting up a new phone or after the carrier processes a new line, upgrade, replacement or account change.
- Connect the iPhone. Use a reliable Wi-Fi network or hotspot unless the device and carrier support activation without one.
- Look for the assigned plan. During initial setup, follow the cellular prompts. After setup, watch for a Cellular Plan Ready to Be Installed notification.
- Open the plan. Tap the notification and select Continue. If the notification has disappeared, open Settings and look for a carrier plan ready to install.
- Complete any carrier verification. The carrier may require an account password, PIN, one-time code or approval from the account owner.
- Wait for the line to appear. Keep the iPhone connected while the carrier finishes provisioning. Do not begin a QR-code or manual installation at the same time.
Once the plan appears under Cellular settings, label it and test the service before removing or resetting the previous phone.
Activate an eSIM on iPhone With a QR Code
A QR code contains the information required to download a specific eSIM profile. Use only the code provided for that plan. Some activation codes are single-use, so repeatedly scanning the same code after installation will not create another copy.
Scan the QR Code During iPhone Setup
- Continue until the Set Up Cellular screen appears.
- Tap Use QR Code.
- Place the provider’s code inside the camera frame.
- Follow the prompts to add the cellular plan.
- Enter a confirmation code only if the provider supplied one.
Scan the QR Code After iPhone Setup
- Open the Camera app and point it at the QR code.
- Tap the Cellular Plan Detected notification.
- Select Continue.
- Tap Add Cellular Plan.
- Complete any provider or carrier verification.
You can also open Settings > Cellular > Add eSIM > Use QR Code and scan it there.
Install a QR Code Displayed on the Same iPhone
On iOS 17.4 or later, press and hold a supported QR code received in the default email app or displayed in the default browser. Select Add eSIM and follow the prompts.
If Add eSIM does not appear, display the QR code on another phone, tablet or computer. You can also use the provider’s app or manual installation details when it supports those alternatives.
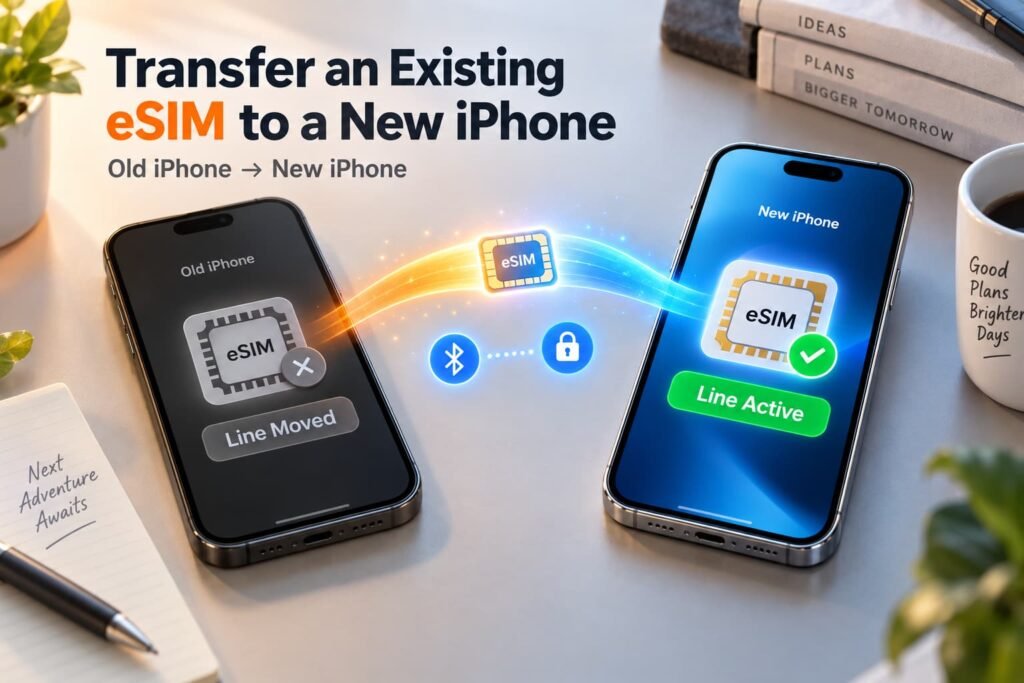
Transfer an Existing eSIM to a New iPhone
eSIM Quick Transfer moves an eligible physical SIM or eSIM from a nearby iPhone without requiring a new QR code. The carrier must support the transfer for the account and line.
Apple currently requires both iPhones to use iOS 18.4 or later. The phones must be signed in with the same Apple Account and remain nearby with Bluetooth turned on. The previous iPhone must be unlocked with its device passcode and available for confirmation.
- Prepare both phones. Unlock them, connect them to Wi-Fi and turn on Bluetooth.
- Open the transfer menu. On the new iPhone, go to Settings > Cellular > Add eSIM.
- Choose the number. Select an available cellular plan or tap Transfer From Nearby iPhone.
- Approve the transfer. Follow the prompts on the previous iPhone. Enter the verification code displayed on the new iPhone if requested.
- Wait for carrier activation. Keep the phones together until the line appears on the new iPhone.
- Test the new phone. Confirm that cellular data, calls and messages work before erasing or trading in the previous device.
A carrier can support eSIM without allowing Quick Transfer for every plan or account type. If the number does not appear, use the carrier’s account, app or support process instead of deleting the working line from the old phone.
Important Note: A Completed Transfer Can Disable the Previous SIM
When Quick Transfer finishes and the cellular plan activates on the new iPhone, the previous SIM or eSIM for that number is deactivated. Converting a physical SIM to eSIM can have the same result.
Do not begin a transfer immediately before a flight, account-security deadline or another situation in which losing access to calls or authentication texts would create a problem. Keep the previous phone available until the new iPhone has working service.
If a transfer stalls or fails, preserve the existing profile and contact the carrier. Deleting the eSIM from either device does not guarantee that it can be downloaded again.
Using an eSIM Activation Link or App on iPhone
Use an Activation Link
A carrier or travel eSIM provider may send a secure activation link instead of a QR code. On iOS 17.4 or later:
- Open the link on the iPhone.
- Tap Allow when Activate New eSIM appears.
- Select Continue and follow the remaining prompts.
Use links only from the carrier’s official website, app, account portal, email or support channel.
Use a Carrier or Travel eSIM App
Install the provider’s official App Store app and sign in to the account used to purchase or manage the plan. Select the correct line or travel plan, choose the installation option and approve the iOS prompts.
The app may handle account authentication and then send you to iPhone Settings to add the profile. After installation, you still need to select the correct line for cellular data and review roaming settings.
Enter eSIM Details Manually on iPhone
Manual entry is useful when the carrier or provider supplies an SM-DP+ address, activation code and, in some cases, a confirmation code.
These values belong to the individual provider or plan. Do not use an SM-DP+ address or activation code copied from an unrelated website.
- Open Settings > Cellular > Add eSIM.
- Select Use QR Code if necessary.
- Tap Enter Details Manually.
- Enter the supplied SM-DP+ address and activation code exactly.
- Add the confirmation code only if one was provided.
- Tap Next or Continue and wait for the profile to download.
If the manual details are rejected, confirm them with the provider. Repeated attempts will not fix credentials that have expired, already been used or been assigned to another device.
Convert a Physical SIM to eSIM on iPhone
Some carriers let you convert the physical SIM already active in an iPhone without changing the phone number or opening a new line.
Open Settings > Cellular, select the line and look for Convert to eSIM. Follow the prompts and wait for the eSIM to activate before removing the physical SIM.
The option is carrier-controlled and will not appear for every account, plan or iPhone. If it is missing, the carrier may require an app, account request, activation notification, QR code or support-assisted conversion.
Move an eSIM From Android to iPhone
Direct Android-to-iPhone eSIM transfer is available only with supported phones, software and carriers. Apple’s current iPhone eSIM instructions list the supported transfer paths and requirements.
If the transfer option appears during iPhone setup, follow the instructions on both phones and keep them nearby. When a supported direct transfer completes, the SIM on the Android phone is deactivated, so test calls and data on the iPhone before resetting the old device.
If the transfer option does not appear, contact the carrier before deleting the working eSIM from the Android phone. The carrier may need to release the old profile and assign a replacement eSIM to the iPhone.
Install and Configure a Travel eSIM on iPhone
A travel eSIM can normally be installed before departure, but installation and plan activation are not always the same event. Some plans begin when installed, while others begin only when the eSIM first connects to a supported network. Check the provider’s validity policy before adding it too early.
After installation:
- Label the line. Use a clear label such as Travel, Europe, Japan or the provider name.
- Keep the primary number identifiable. Label the home line as Primary, Home or the carrier name.
- Choose the data line. Open Settings > Cellular > Cellular Data and select the travel eSIM when you are ready to use it.
- Review data switching. Leave Allow Cellular Data Switching off when you want strict control over which plan uses mobile data.
- Set roaming correctly. Many travel eSIMs require Data Roaming on because they connect through partner networks. Follow the provider’s instructions.
- Protect the home line. Keep Data Roaming off on the primary line if you want to prevent that line from using roaming data. Calls, texts and voicemail activity may still generate carrier charges while the line remains active.
A data-only travel eSIM does not replace your normal phone number. Your home line can remain available for iMessage, FaceTime, calls and texts, subject to your carrier’s roaming rules and charges.
Confirm That an eSIM Is Active on iPhone
An installed profile is not necessarily a working connection. Complete these checks before relying on it:
- Confirm that the new line appears and is turned on under Settings > Cellular.
- Check Control Center for the expected carrier or network name.
- Select the eSIM under Cellular Data, turn off Wi-Fi and load a webpage.
- Make a call or send a text if the plan includes voice and SMS.
- Verify that the previous SIM stopped working after a transfer or conversion.
- Remember that a travel eSIM may not connect until you reach a covered destination.
If the line works with Wi-Fi off, uses the intended cellular plan and provides the services included with the plan, activation is complete.
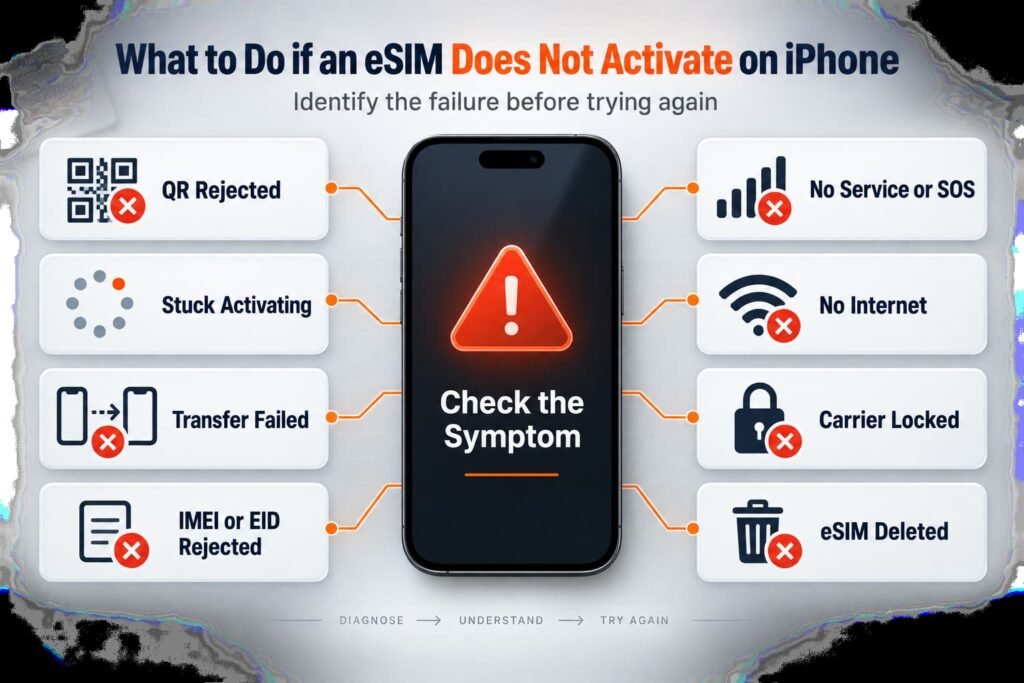
What to Do if an eSIM Does Not Activate on iPhone
Identify where the process failed before trying the installation again. Each symptom points to a different problem:
- A QR code will not scan or is rejected.
- Activation remains stuck on Activating.
- Quick Transfer fails to complete.
- Your carrier rejects the IMEI or EID.
- An installed eSIM shows No Service or SOS.
- The line connects to a network but has no internet access.
- Carrier Lock prevents activation with another provider.
- A deleted eSIM cannot be downloaded again.
Keep the installed profile unless the carrier or provider confirms that it is safe to delete and explains how it will be restored. Save the QR code, activation details, order number and exact error message.
For symptom-specific recovery steps, use the eSIM troubleshooting guides. Contact the carrier when the failure involves account provisioning, number transfer, device eligibility, IMEI/EID rejection or replacement credentials.
Frequently Asked Questions About Activating an eSIM on iPhone
Why Is Add eSIM Missing From My iPhone?
The option may be missing because the exact iPhone model or regional variant does not support eSIM, the carrier does not support eSIM for that device or account, device-management restrictions block cellular changes, or the phone needs a software update.
Check the model number, EID and Carrier Lock status under Settings > General > About. If there is no EID, the device may not include usable eSIM hardware. If the EID is present but Add eSIM remains unavailable, verify the model and account with the carrier.
How Long Does iPhone eSIM Activation Take?
Downloading the eSIM profile may be relatively quick, but carrier provisioning can take longer. Transferring an existing phone number may also take longer than installing the profile itself. The total time depends on the carrier, account and activation situation.
Activation is not complete until the line appears in Settings and the services included with the plan work. If the process stalls, record the exact error message or status before restarting. Do not repeatedly scan the QR code or delete the profile without confirming that the activation credentials can be reused or the eSIM can be restored.
Will Activating an eSIM on My iPhone Change My Phone Number?
Adding a data-only travel eSIM does not normally change the number on your primary line. It creates a second cellular plan that you can select for mobile data.
Quick Transfer moves the existing number to the new iPhone, and converting a physical SIM to eSIM normally keeps the same number. A newly opened carrier line may receive a new number unless you arranged to transfer an existing one.
When Should I Install a Travel eSIM on My iPhone?
Install it while you still have reliable internet and enough time to confirm that the profile appears correctly on your iPhone. If the provider allows advance installation without starting the plan, you can add the eSIM before departure, give the line a clear label and leave it turned off until you are ready to use it.
Wait until closer to departure when the plan starts as soon as it is installed or when the provider specifically tells you not to add it early. Keep the purchase confirmation, installation instructions and support details available after installation. Installing the profile places the eSIM on the iPhone, while activation or the plan’s validity period may begin at a different point set by the provider.
Is Wi-Fi Required to Activate an eSIM on iPhone?
A Wi-Fi network or personal hotspot is required for most iPhone eSIM downloads because the phone must contact the carrier’s activation system. Apple notes that some eSIM-only iPhones can activate without Wi-Fi in certain countries and regions.
Unless the carrier specifically confirms otherwise, connect to reliable Wi-Fi before starting. A weak or interrupted internet connection can leave the plan waiting for download even when the carrier has assigned it correctly.
What Details Does a U.S. Carrier Need for iPhone eSIM Activation?
A U.S. carrier may request the phone number, account PIN, one-time security code, IMEI, IMEI2 or EID. The exact requirements depend on whether you are activating a new line, bringing your own phone, replacing a device or transferring existing service.
You can find the device identifiers under Settings > General > About. Give them only to the carrier through its official website, app, store or verified support channel.
Does Deleting an eSIM From My iPhone Cancel the Cellular Plan?
Deleting an eSIM removes the installed profile from the iPhone, but it does not necessarily cancel the carrier account, subscription or billing. Cancellation normally must be completed separately through the carrier or travel eSIM provider.
Deleting the profile also does not guarantee that the original QR code or activation credentials can be reused. Confirm the restoration or reinstallation process before deleting a working eSIM. If the profile was deleted accidentally, the carrier or provider may need to issue replacement credentials or reassign the line.
Related Guides
Final Thoughts
When I set up an eSIM, the first thing I determine is whether I am moving an existing phone number or adding a second line. That distinction usually identifies the correct method. A number moving between iPhones may qualify for Quick Transfer, while a new carrier line or travel eSIM should follow the activation path supplied by the carrier or provider.
The part I would not rush is the handoff from the working SIM or phone. Keep the previous device and profile available until calls, messages and cellular data work on the new line. If activation stalls, record the exact error and confirm how the eSIM can be restored before deleting anything. Spending a few extra minutes testing the new line is much easier than trying to recover credentials that cannot be reused.